
A Quick and Dirty Path Analysis of Sonic the Hedgehog
Yes, there is more to it than "jump good to take higher, cooler path." A lot more.


I’ll be brief: I don’t think people who analyze Sonic speak to the game’s strengths (or weaknesses) properly. While I do not have the energy in me to dissect the game with a surgeon’s pedigree, I do have the time to speak to the pathing design in Sonic games. Conventional wisdom and most armchair analysis decrees that “cool people take the top routes; the bottom routes are where players start by default.” This isn’t remotely true but feels true to anyone who has played Aquatic Ruins Zone in Sonic 2. Many will cite this same pattern to the Sonic 1 Zones!
None of this is true. At best, it’s a simplification.
Sonic’s path design isn’t *too* complex, but there are distinct flavors of different paths. Today, we will look at the maps of Sonic levels to analyze and refute the idea that Sonic even *has* a homogenous level design approach, let alone one that was cemented as early as the first game. I have created new assets for our study and leave matters of subjectivity as an exercise for the reader (you).
As an aside: Please forgive the slightly lower standards of writing on display in this article. This was a challenge to write something shorter in a week. I’m still working on longer pieces (there is a really good one in the chamber about the first Mcdonalds), but you may see smaller (and hopefully better) installations on this blog in the future.
Before we get to the analysis, some things you should know about Sonic 1:
There is no Spindashing in this game. You had to gain speed by using slopes and rolling to your advantage.
You do not gain speed by running. Running for about 2ish seconds is enough to get you top speed, and jumping can get you there even faster. The main reason for this is
Sonic 1 has a unique and aggressive Speed Cap. If you are running and so much as *touch* a direction on the controller, the game immediately subtracts all speed over the very low cap and returns you to a slow chug. That means if you run down a steep hill, you run down it at a near constant slow rate. This sounds wrong if you have played a port of Sonic 1 or its sequels- no other iteration of sonic features the speed cap in the same way. This ensures that in Sonic 1, you HAVE to roll in order to exceed the speed cap.
With that, on with the analysis! All sprites used are sourced from here.
KEYS FOR THE MAP:
GREEN HILL ZONE
Sonic 1 does not feature a save battery and was therefore designed with hard game-overs in mind. Lose all your lives (and continues if you have them) and it was back to the start for you! This means the first few levels (the first Zone in particular) needed to be polished to perfection, as well as constantly challenge and tutorialize the player on skills required to beat the entire game. Most know this, but I didn’t want this to be absent from an analysis, as today we will see how Green Hill Zone offers players novel and returning a decent (but controlled) variety of paths to traverse the levels.
Green Hill Zone: ACT 1
In the minds of all new Sonic players, Act 1 exists only on the white lines- it is no coincidence then, that this is the most fun and iconic section of Sonic. The only insight to add that I have is the liberal use of one way paths- they definitely wanted to ensure you kept moving toward the exit rather than double back. The lowest path (for players who dared not jump into the spring to the higher white path) skips the red path entirely. You will see that sometimes I mark a large collection of rings as an item- I hope you would agree with my decision.
Below is an abstractification of the above line chart- I simply condense the shapes into circles and ignore any spatial arrangement that does not meaningfully contribute to the path branching. I do this analysis often on map focused games, so hopefully you find them useful abstractions as well. Please note I have cut off the beginning linear section for clarity.
Green Hill Zone: ACT 2
It is worth pointing out that my judgment for a “higher skill floor required for entry” is entirely subjective. Perhaps you see taking the swinging platform over the spikes as “trivial,” but to a novel player it may be insurmountable. As the stages progress, so does general expectations for competency. Often, It makes sense to mark the “harder” path as a red one, even if the difference is only by barely. I’m aiming for analytical clarity, not objective judgment.
Act 2 introduces a blue path, albeit a very small one. I tested it out- it’s pretty hard if you’re just holding right to fall in that pit. It’s a longer path to the exit, but there ARE a few items. It also features a small tutorial on secret walls at the start- there is a monitor placed just up against a miscolored wall. Rolling thru the monitor at a high enough speed is enough to reveal the secret. These will feature more prominently in the next level!
Looking at the graph below, it’s clear they more explicitly want the player to have opportunities to engage with alternate paths- the main path through is noticeably windier.
Green Hill Zone: ACT 3
This is it- this is the blueprint for Sonic level design in an easy to digest, linear format. While many tend to oversimplify in describing “high path rules, low path drools,” you merely have different options for different sort of players. There is even spicy section along the blue path that dumps a staggering number of goodies if players take a leap of faith just before exiting the blue path.
This stage has the most checkpoints of any stage. Interestingly, players who favor the hidden blue path skip the first freebie checkpoint. As a counterpoint, the red path is given its own special checkpoint so players will be forced to try and keep the high ground should they (somehow) die. It’s possible! But very unlikely.
Modern design (and by Modern, I mean the Master System version of Sonic the Hedgehog did this) would make Act 3 the shortest one (since it features a boss), but instead it is the largest level yet.
Perhaps more interesting: nothing in any of these stages (including the red path!) requires rolling, let alone competent rolling. There are 3 different clear forks to the red path, and 2 different blue path alternatives. If you feel like you don’t remember Act 3 clearly, it might be that you took a myriad of different routes! There are very few strictly linear portions of this level (the longest one being the secret blue path, interestingly). If I were do some armchair level design, I would stick like 2 ring boxes in that lower path.
Final thing: There are 4 different hidden (blue) items, half of which are on the red path. While more common in later Sonic games, you won’t be seeing camouflaged items for a long while in Sonic 1!
Looking at the simplified map below, we see the first major instance of taking one alternative path blocking a player out from opportunities to take other paths! Decisions like these help the level feel varied across multiple playthroughs, rather than a simple “one path is cool, the other is lame.”
MARBLE ZONE
You know this zone. I know this zone. It’s got a great tune, and everyone hates playing it. I won’t repeat what others say, I will instead show you:
Marble Zone: Act 1
It’s sobering, isn’t it? Remember what I said about the red lines being subjective? I had to make the same decisions about the slightly “hidden” item boxes near the start. Remember, this is a game made for children, and we’re only in the second act.
(by children I mean literally four year olds. Children are much smarter than this)
It’s tiny, but keep in mind the stage is designed to make you wait for hazards and lava boats. If someone looks at this map and tells me “If you’re super cool you can go fast!” then please understand that I am mainly concerned with the path design.
A friend of mine told me “What a lovely painting of some tress you made.” If only.
Marble Zone: ACT 2
Since we are looking at an even more dire straight line to the end, I may as well clarify something:
Often, amateurs will discuss game design from a specific angle (such as path design) only to make foolish statements such as “Look at how linear this level is! That’s why it’s bad!” Linearity is not inherently bad- perhaps nothing truly is. I will instead talk about specific things I notice, as sweeping statements about “objective quality” bore me.
This level gives you a lot of items. There are 4 different lava pits to slowly wade through, half of them can be traversed at speed with either good skill or good item usage. It is unremarkable. I don’t mean that as a judgment, I am literally struggling to remark on it.
I was going to use SMB1 levels as a bastion of linear levels, but most levels in Super Mario Bros. feature secret pipes that will then warp players to different spots forwards (or sometimes backwards!) in a level. What I am trying to say is that following Green Hill Zone 3, two zones of repeated linearity is a bit shocking, especially since Act 2 is merely a longer version of Act 1 structurally.
The simplified version does confirm that yes- this is simply act 1 with more stuff in it.
Marble Zone: ACT 3
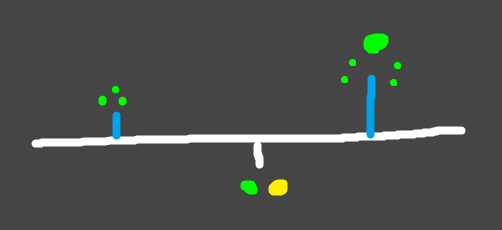
While the blue path is appreciated, it is actually the slower way through the level with zero items to boot…. interesting choice! If I was still offering level design edits (a thing I used to do years ago for a few hundred or so people) I would have zoomed in on that sort of thing- you don’t have to explicitly reward the player for putting in effort for something, but you should be mindful to completely fail to acknowledge effort!
Some have objected with my decision to label the blue path here as “secret”- but keep in mind, the blue path takes more effort to enter, even if miniscule. When we’re talking about a level at this low of a complexity, any decision on delineation becomes tough.
The simplified version confirms that yes, Act 3 IS a slightly more interesting version of the other 2 acts. Are we done now?
SPRING YARD ZONE:
Perhaps you remember this zone being fun, and maybe you have even made the mistake of committing the armchair analyst’s sin of using a designers hammer so much you see every problem as a nail (or an image of a turtle, in my case): you might have falsely assumed Spring Yard Zone features A LOT of alternate paths to take. It offers more than zero, sure, but it is by all means very linear! There is a reason for this, and there is a reason you remember it as fun:
Spring Yard functions as a tutorial on how to *actually* go fast in Sonic 1. The zone teaches you about rolling on slopes, rolling into springs, and gaining height in half pipe formations. In fact, the levels eventually require you doing some of these skills competently in order to proceed. Let’s see how that looks!
Spring Yard Zone: ACT 1

Act 1 is the first stage to force players to climb large vertical spaces quickly. Marble Zone was technically more vertical, but slower and more staircasey. The level starts out with having to use the springs to ascend 2 different ramps.
Another key thing about these ramps: You must roll up the hills, or you will not make it up.
We finally have to talk about the innerworkings of Sonic 1: You have two states: running and rolling. Running in Sonic 1 is the slow option. Running is easier to control, but the game (unlike later entries) will aggressively cap your speed to a speed that could barely ascend shallow ramps. Rolling removed all caps on speed, but your inputs would turn into mere suggestions (ignored until thrown into the air altogether).
You may be wondering about that green line- to take the green path, you must press the button, turn around, and jump on the platform before it ascends. This feels too esoteric for a regular blue path, so I colored it differently! This level has little more to point out in words, as once you pass the tutorial section, Act 1 is mostly interested in familiarizing you with its enemies and hazards. It still has some hidden shortcuts for interested players!
Spring Yard Zone Act 2
Act 2 attempts to teach the player about rolling’s unique speedy properties, as well its potential for gaining height (Sonic jumps higher the faster he is going. one of those things in platformers you just don’t explicitly think about). The near stage-spanning ramp in the middle is the biggest chance the player has to freely roll with nothing to impede them.
The blue path in Act 2 is the first one I would describe as “massively hidden”, as it requires walking through a false wall. It only exists for players who fail to roll up to the first red path (or instinctively descend to see what path they missed). I kind of think they may have stuck the blue path in for players who ascend the first red path, come to the interesting descending blocks, and fall blindly backwards? If I were to armchair design this level, I would have made the top of the moving block tower a one-way floor- but perhaps this approach is more versatile and more interesting! I’m still afraid of the inevitable player who takes that bottom path backwards and gets potentially frustrated.
Once you’re past the big ramp, this stage *finally* brings back skill challenges, with multiple opportunities to ascend to the higher path. There’s nothing up there, but it is fun! They even threw in a second goal ring as a way to reward players who succeed (or fail) to make the ramp jump at the end of the stage.
Looking at the simple version below, it is clear to these big set pieces broken up with smaller divots and secrets. There is always an interesting choice forward! What you don’t see is a lot of path lockout. I suspect this is what makes the Spring Yard Acts feel a bit simpler than their Green Hill counterparts- you have circle after circle after circle, always returning to a nice pinch point. Perhaps you noticed: the tutorials in this stage are so important that they decided to give no checkpoints!
Spring Yard Zone: ACT 3
This stage is yet another tutorial level, which tests you on utilizing ball physics to gain height UP ramps.
However: What looks like a coherent level instead becomes a pretty linear affair due to what I assume is a mistake in design: I do not think the one way in the first red path was intentional- your reward for taking the red path from the top of the white path results in absolutely nothing. My current theory is they forgot to place a spring to ascend that small cliff. I have my best gaming mystery investigator on the case right now. Discord user Calm Ronald Calmly booted up the game and managed to just barely be able ascend past the wall, but it would be unreasonable to expect most players to be able to do that.
This level also requires rolling up the giant half pipe at the middle to progress- the game can now feel like it can ask some skilled players to utilize the rolling mechanics casually. I imagine the next zone will feature these ramps prominently.
Looking at this last simplified map confirms it: you mostly have linear lines with these small bursts of path choices. It isn’t linear per se, but it *is* simple when you look at the basic pathing!
LABYRINTH ZONE

No, the stage isn’t bad because of the water. The water is good! There’s a reason it shows up in all Sonic games except Sonic and Knuckles (really). It’s the Zone’s insistence in locking you in rooms where you wait on slow rotating platforms, hunt down a switch, or have to dodge fireballs to not stop your already slow tracks for 6 minutes. There isn’t even a ramp underwater! I’m not sure if they’re even functional in Sonic 1!
I’m going to save you from complaining too much. We all know this stage sucks, but it sucks both more AND less than you would think.
While I’m here, let me complain about a completely free resource that I would not have been able to write this article without: the sprite maps for both Labyrinth and Starlight Zone have their backgrounds set to black- it means without a lot of editing, setting the black background to transparent will turn ALL black pixels transparent. You can avoid this by simply paint bucketing the background to a different color, but it will also color any black pixels that happen to be touching each other.
In other words, I am sorry these next 6 maps will have odd transparency issues.
LABYRINTH Zone: ACT 1

I will explain the green line. You press a switch, avoiding a rising platform that is your only ticket back up. A new platform appears, which will take you across the lake to a shortcut to the end. In a way, this elevates the level further than the Marble Zones. Perhaps.
As you can see below, the green shortcut is the only thing preventing Act 1 from being the simplest path map in the game. Honestly, the simplification does it more favors than it deserves.
LABYRINTH Zone: ACT 2
This level is so bad because it is so linear. There I said it.
There is also nothing in it. Waste o time! I’m dead serious, if it wasn’t for the gravity section the map would be a literal hallway from beginning to end.
LABYRINTH Zone: ACT 3
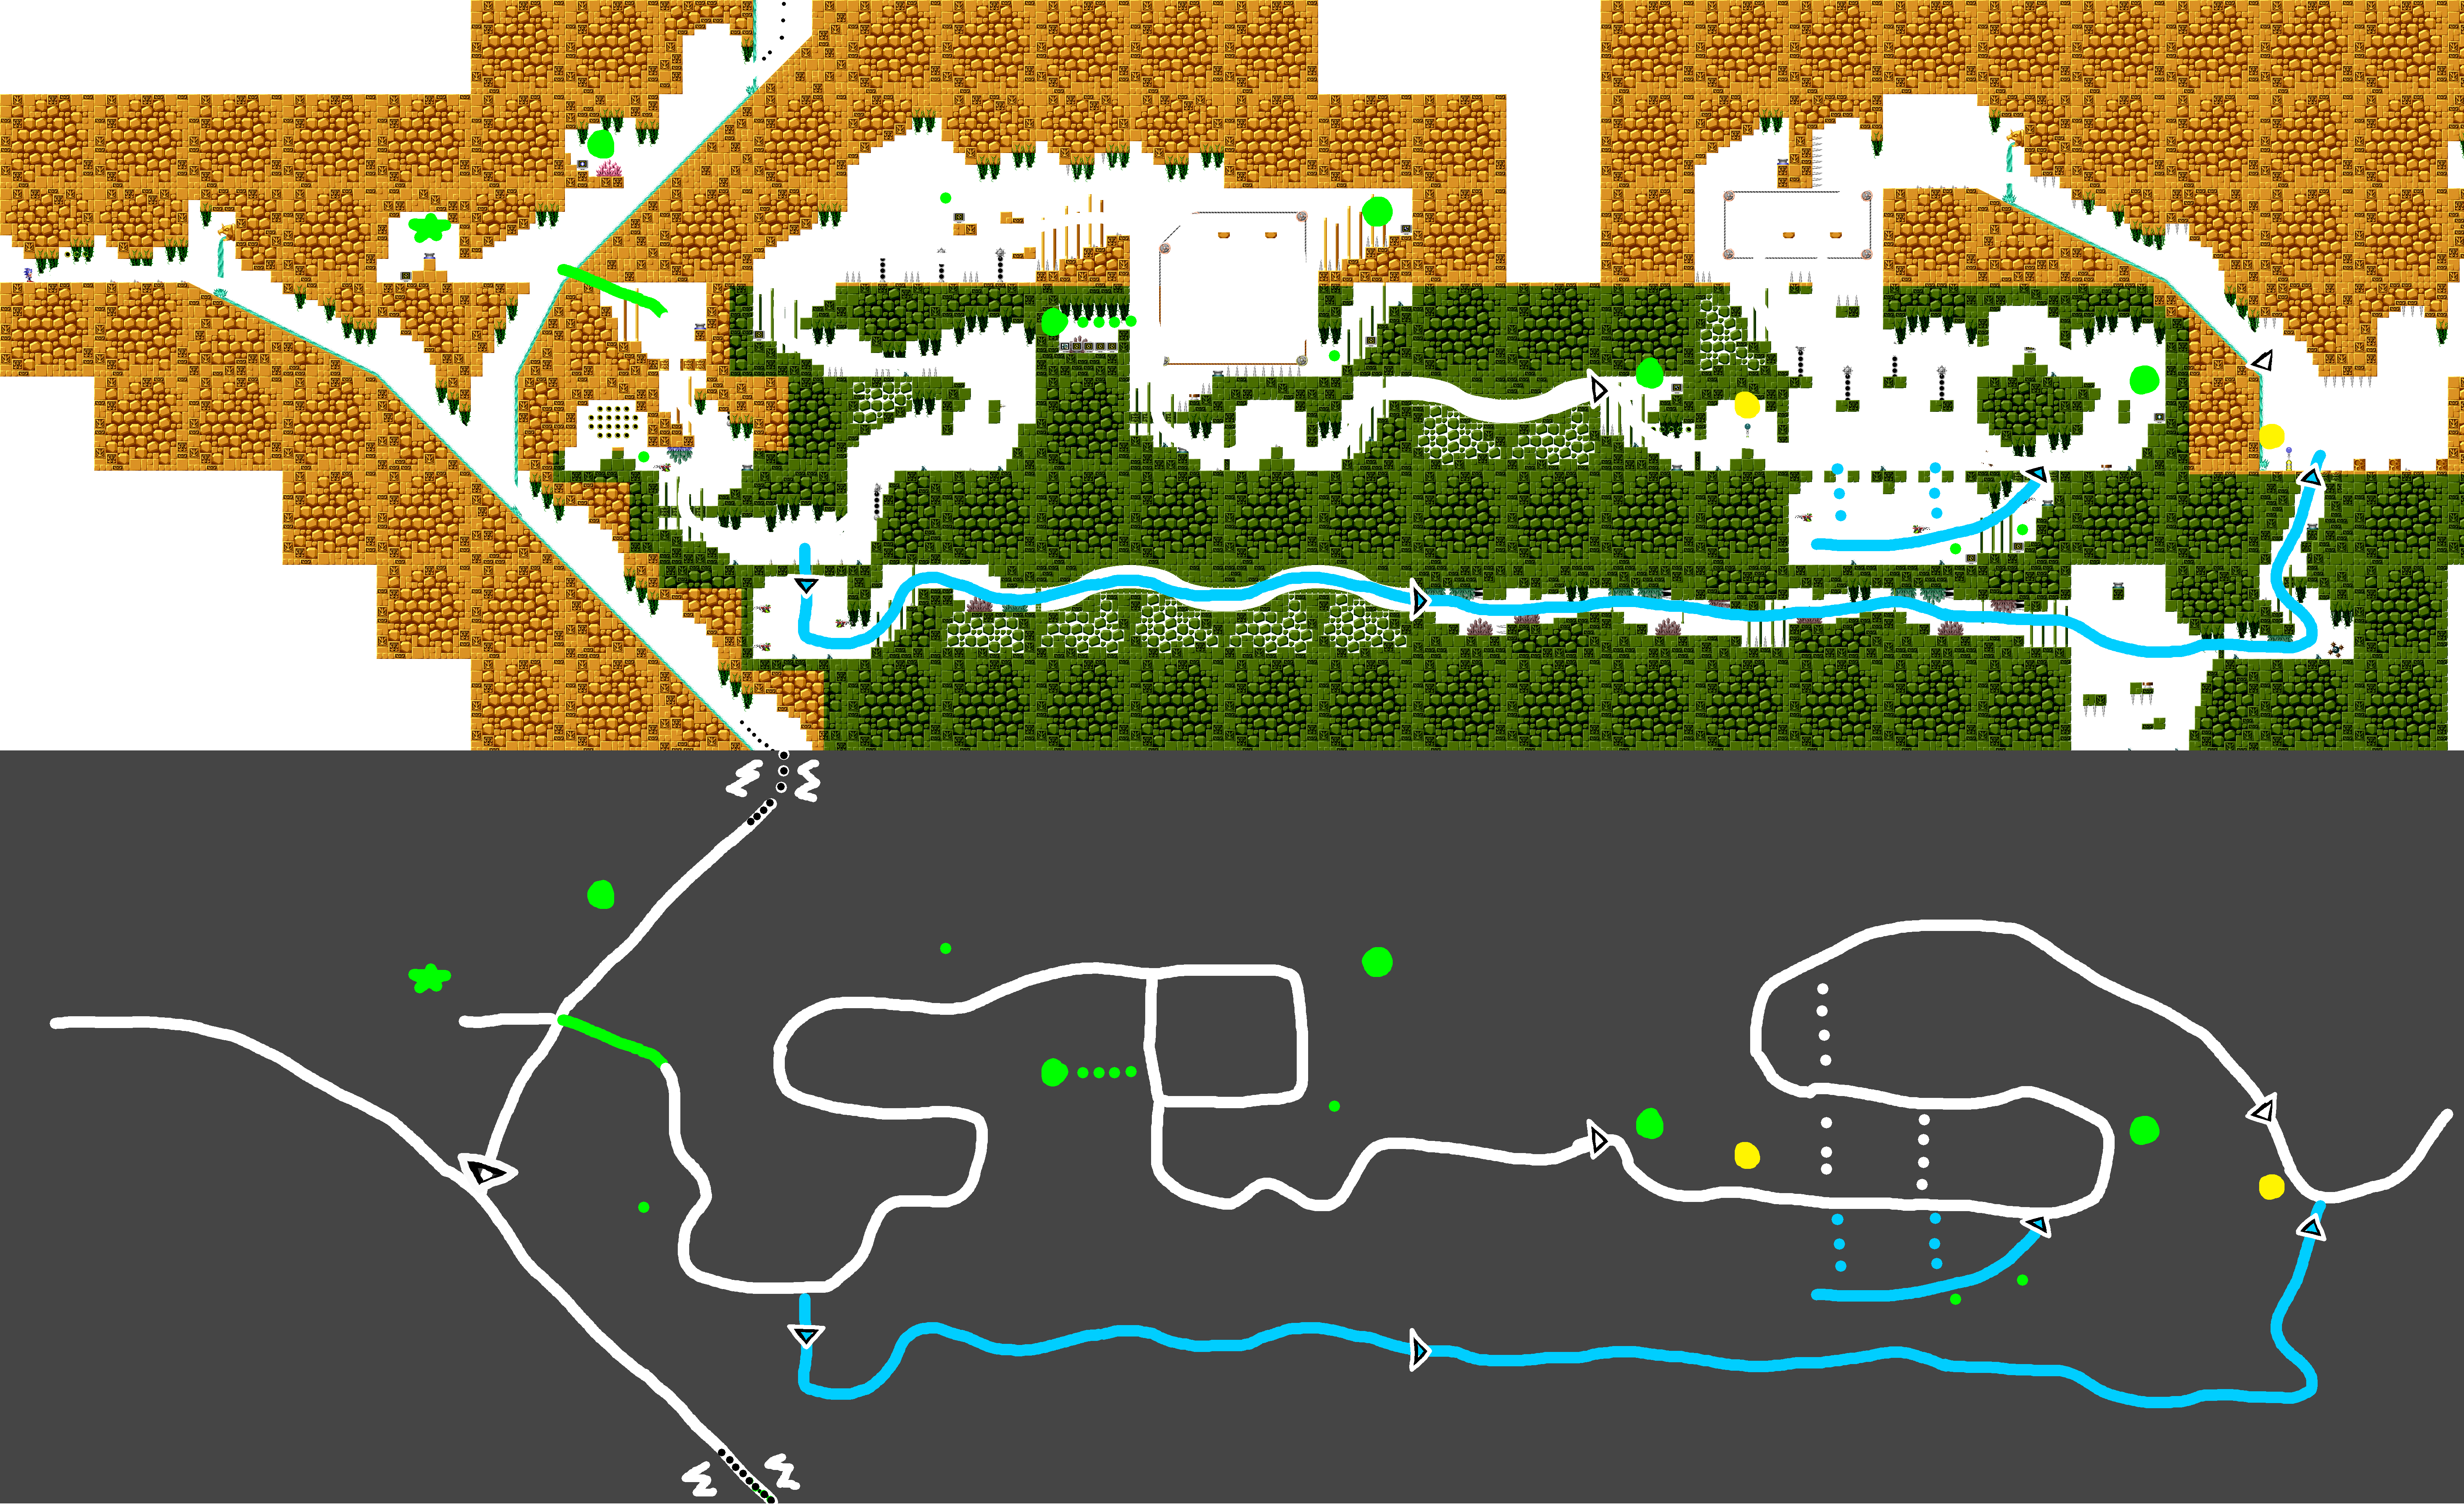
This the first level that vertically scrolls- IE: the top wraps around the bottom. You can see this happen only in the water slide at the start. You are forced to find the switch to escape slipping slide purgatory, which unlocks the only mandatory green path in the game.
Honestly! This level is full of good ideas! It is the only good level in this entire zone! It tries to match the namesake of being a labyrinth, with all sorts of secret paths. Later Sonic games go out of their way to revisit this exploratory structure- tbh, if you where to add one more fork on the blue path and add like 3 different red paths, ACT 3 serves as a template for future Sonic levels.
Structurally, this also bears a striking resemblance to Marble Zone act 3, with its winding platforming structure to top the level off. From here on out, nearly every level will feature winding platforming section on the main path- It slipped my mind that this level tries to find a safe (albeit frustrating) way to ease you into this structure.
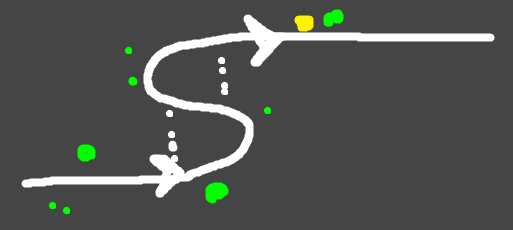
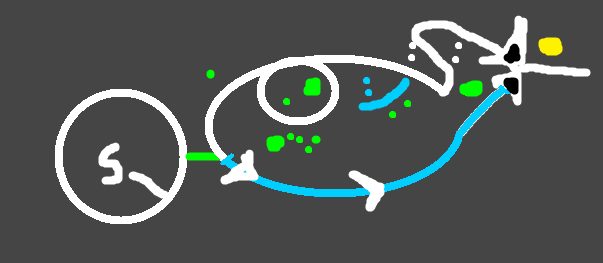
See, people hate this act, but it atleast *resembles* some of the more complex design offered in other zones, while also offering some unique ideas regarding level structure! In case it wasn’t clear, the S is where you start.
STARLIGHT ZONE
You have to trudge through 2 boring zones and 1 tutorial zone to get here, but Starlight Zone is the designed realization of Sonic 1’s level and movement design. It is tempting to say that it’s the blueprint of all future sonic games but: It isn’t. It’s clear the designers thought that giving players TOO MANY path choices could lead to aimlessly wandering a level without a feeling of progress (or worse, literally getting lost)- Every stage has atleast 15 one way obstacles to keep the player moving forward. How on earth do they accomplish this? Two ways:
THE FANS. These things blow against Sonic with enough strength to prevent passage, even with jumping. They also push the player through them if approached from the other end, ensuring a player is quickly locked into a path of their choosing (willful or not).
STAIR CASE BLOCKS. There are two variants: one you walk on to, and one you have to jump into from below. Doing the correct action will lower the horizontal line of blocks into a staircase, allowing the player to climb them while often blocking off another path entirely.
I have been abstaining from overexplaining Sonic 1’s Mechanics, but I figured nobody would believe me that the next level had *sixteen* one-way paths without me offering a tiny explanation.
Not to mention, many players do not make it this far. I can’t honestly blame them- they really should have deleted Marble Zone and make Labyrinth Zone an actual maze. Maybe they could add a few more weirder, interesting zones that play with open spaces. Maybe they could do time travel as well? Who knows! Too bad nobody made a game like that.
One more thing: You may notice a lack of checkpoints in the next 3 levels. No, I did not forget to mark them- there really are no checkpoints. I will explain momentarily.
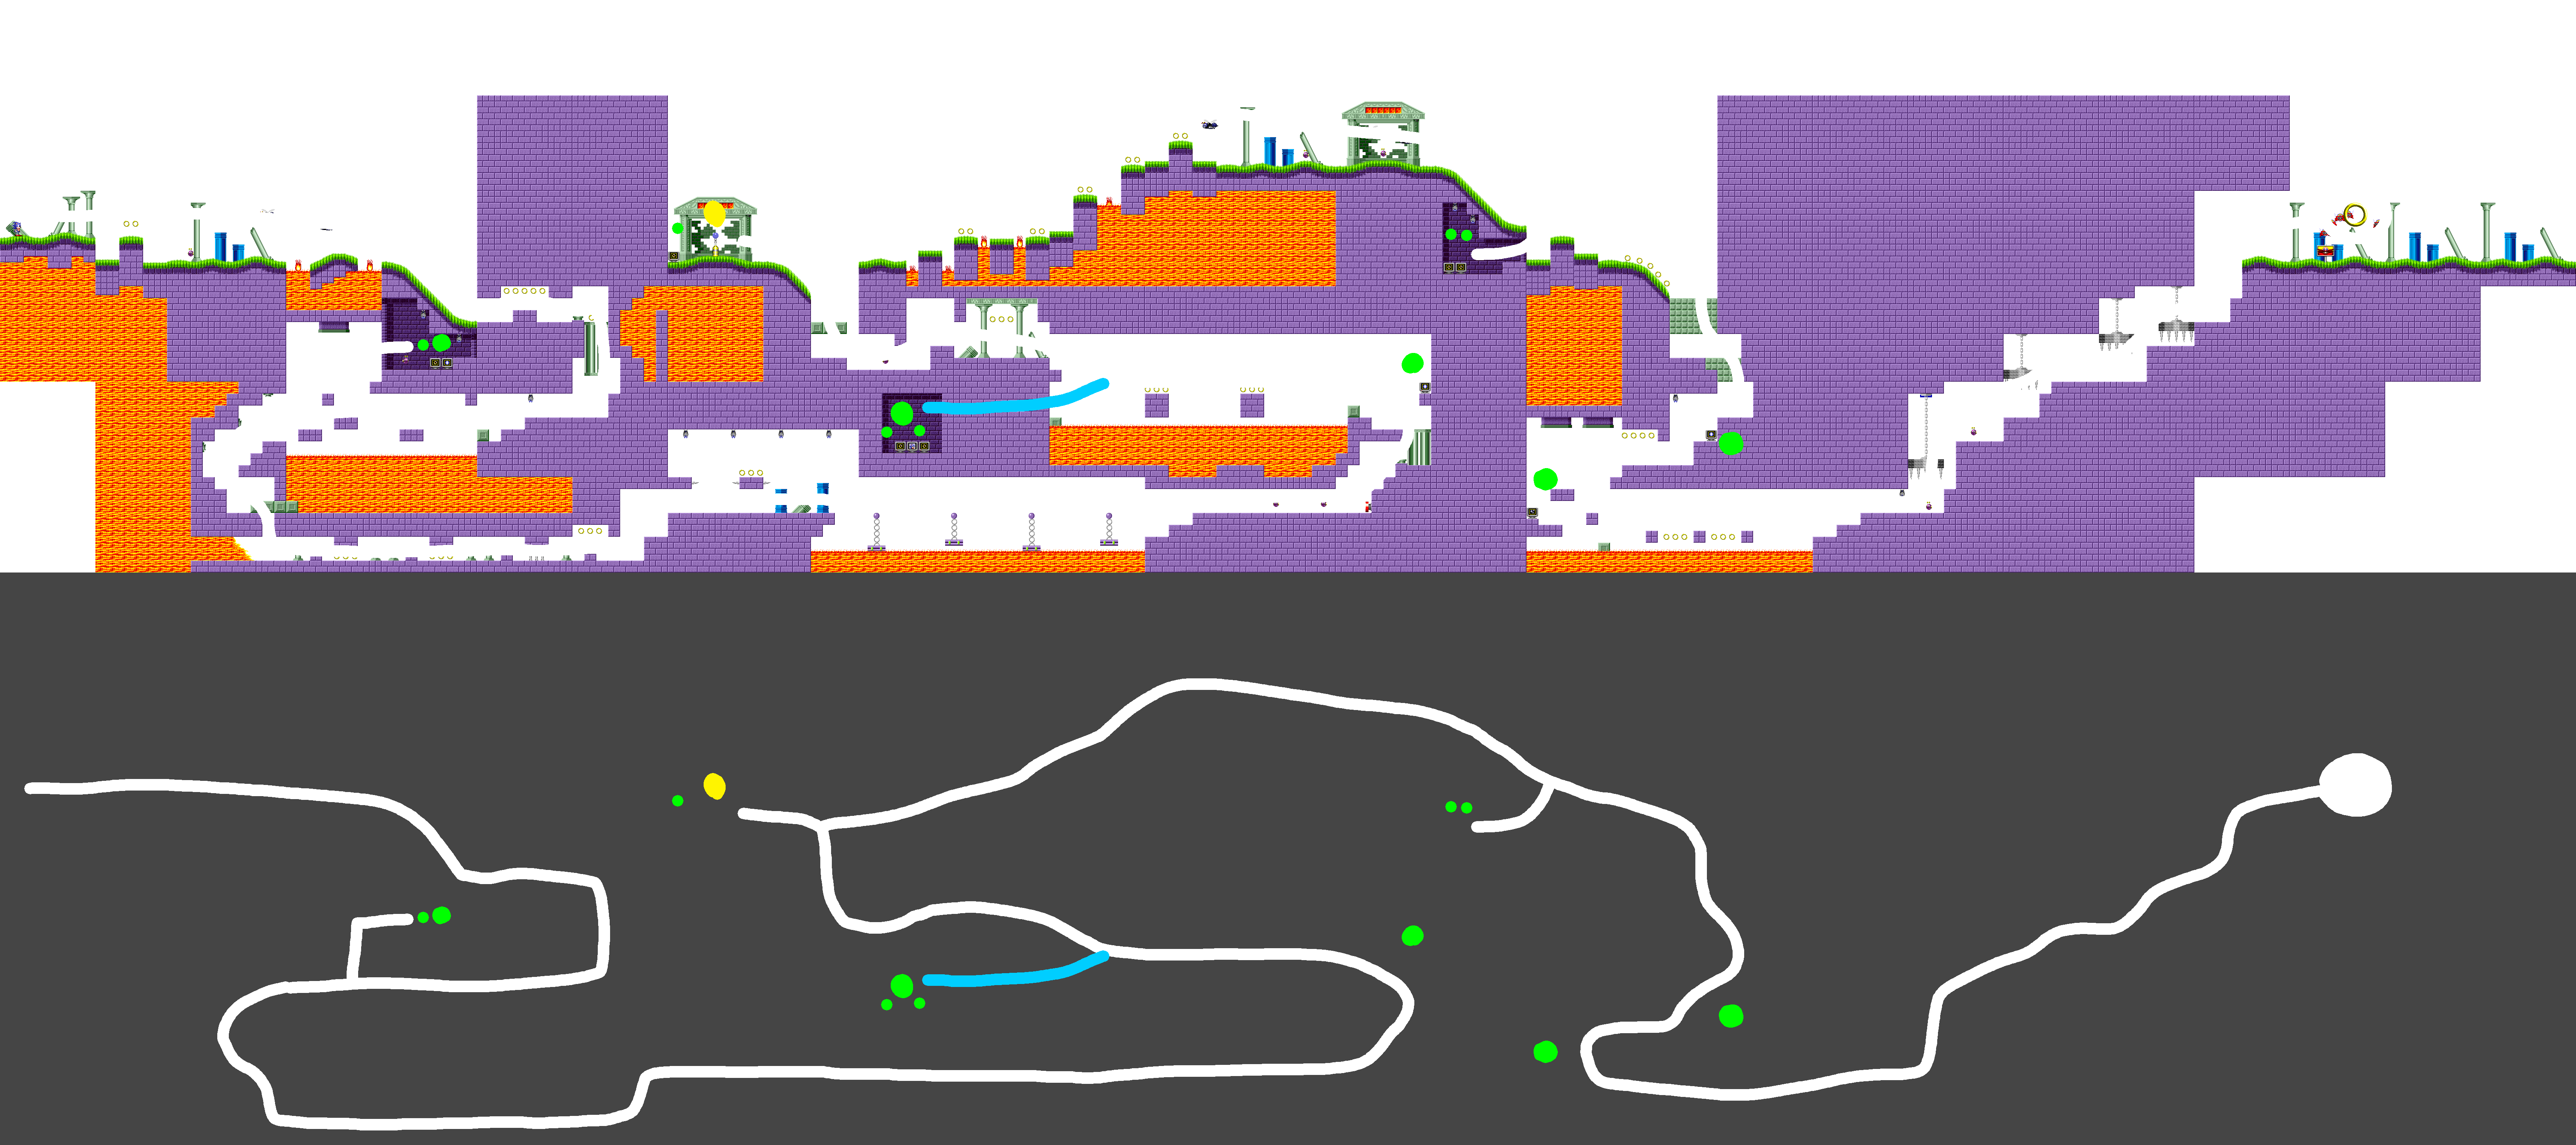
Starlight Zone: ACT 1
This level has 16 one ways. There is nothing further to tutorialize, so the game gets out of the way to drop the best levels it has to offer. Interestingly, there are many blue paths on the first red path, including a red path that requires 3 different skillful ascensions to enter.
Some of these blue paths are entered by interacting with the staircase platforms that must be activated manually. They are a bit finnicky and can be breezed by, so they definitely count as a secret.
The white path also uniquely hugs the bottom and is the hardest path. I’m certain this is the reason for having no checkpoints: they want you to keep getting sent down different paths whenever you die! rewards are carefully thought out and chances are you approach this stage in a million different ways. Most likely, you won’t see the winding platforming section at the end.
The isolated white section is interesting: it is yet another puzzle section. You have to successfully roll through the steep half pipe in order to not fall back to the beginning of the loop. I had to color this section white because both a blue and red section join up to this loop- unless you take the top or bottom most routes, this serves as the final section of the level. Looks like Labyrinth Zone WAS trying to teach you something structurally!
I will admit: my simplification system breaks when you bunch together too many one way obstacles, but perhaps that should tell you they went overboard! As an exercise, feel free to edit the map to try and push the player forward while using HALF as many one way doors. I promise it is possible, and you just have to accept some possibility for players to enter into loops. Just make sure they’re small ones! (NOTE: The lowest I was happy with was 9. This is close to half, but not quite. I want you to outdo me! Or don’t, we have more to talk about!)
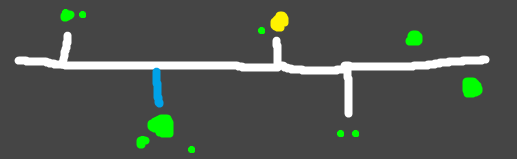
Starlight Zone: ACT 2
This stage is one for the books- it has the most loops in the entire game. Interestingly, the path of least resistance (holding right mostly) hugs the TOP of the stage and is an even-tempered affair. It splits into two equal paths that pick a slightly different flavor of fun for a smooth experience. Players who enter the ending section of the level from the top will have the safest time traversing the ending section- a fall merely means the player falls to a lower path. I call this section “the Teeter Totter Gauntlet”
The bottom half of the level is entered through a crumbling floor- It isn’t a secret, but it is a path that must be opted into over holding right. In addition, the “silly fan” will throw a curious player right into the pit they just opened. They look like a regular, one-way wall fan, but instead they violently throw you backwards.
The alternate path is more fun, with its extreme rolling heights and loops giving you enough speed to escape the game camera. Successfully staying on the red paths (the second one is a surprisingly hard jump to make!) will reward you by placing you at the top of the Teeter Totter Gauntlet.
There are still no checkpoints, and players (mostly those who take the blue path) DEFINITELY die in the Teeter Gauntlet often enough to require a restart. Every restart is an opportunity to take a different path!
Again- too many one-ways for my personal liking, but ultimately they work as far as preventing the player from attempting to navigate this space like a maze. I find it interesting how even in the simplified map, the Teeter Gauntlet is identifiably different than the rest of the level. The first half of the level has very little path lockout as well- it’s overall a pretty straightforward level in comparison to the other acts!
Starlight Zone: Act 3
21 One ways. This stage opens with a BIG chamber with 2 different exits. The level starts bifurcated, but quickly starts locking you into different paths, with plenty of choices to send you into another path- taking the blue path results in no fewer than 2 intersections you can meaningfully take. The main path presents you with 6 meaningful path choices, which is more than any other level in the game by my count so far. It is an amazingly complex stage, and its clear the level designers were terrified of it- hence the abundance of one way paths.
There are still no checkpoints! The lower routes still contain the most likely deaths, but overall any path that isn’t the lowest path will expose you to Sonic 1’s finest level geometry. If you take the highest path, you go through more loops than any single path you can take on the game! It’s a very memorable map with memorable set pieces- it’s almost designed like a house with rooms!
Simply look at the simplified map. Pure bliss. While I try and sperate sections coherent circles, this is the only one I can justify as true, singularly contained hoop with concentric loops and byways. It’s beautiful. It’s a football, and I chiseled it.
Scrap Brain Zone
It’s all downhill from here! Figuratively, unfortunately- Scrap brain features nearly no ramps and few slopes, instead favoring general platforming tests. It is mostly bad. Perhaps the paths are interesting? Let’s find out!
Scrap Brain Zone: ACT 1
This almost looks like a good level but look very closely at where the checkpoint is. When you take it, you are locked out of exploring other options! In particular, if you fail the red path at the first juncture, you are actively barred from trying it again until you game over. The blue path (the hardest one with the most instant death hazards) has absolutely no checkpoint at all! It means that most people’s trek through this level is monolithic- fumble through the center path until the stage is over. If you manage to keep on the one red path, you skip on particularly mean death pit area.
This isn’t inherently bad! After all, players are least likely to repeat the final levels due to a game over, since they’re the end of the game. However, the stage itself mainly consists of pure, methodical platforming and avoiding hazards. Players who favor taking the higher red paths ARE rewarded with more of what they like, but the main path leaves a lot to be desired. The death pit at the end of the main path feels particularly a cruel invention. I’d accuse of swallowing quarters if it wasn’t on the genesis.
Please note that the simplification makes the stage look bigger than it is- the second red path is actually much smaller and closer to the bottom-main path.
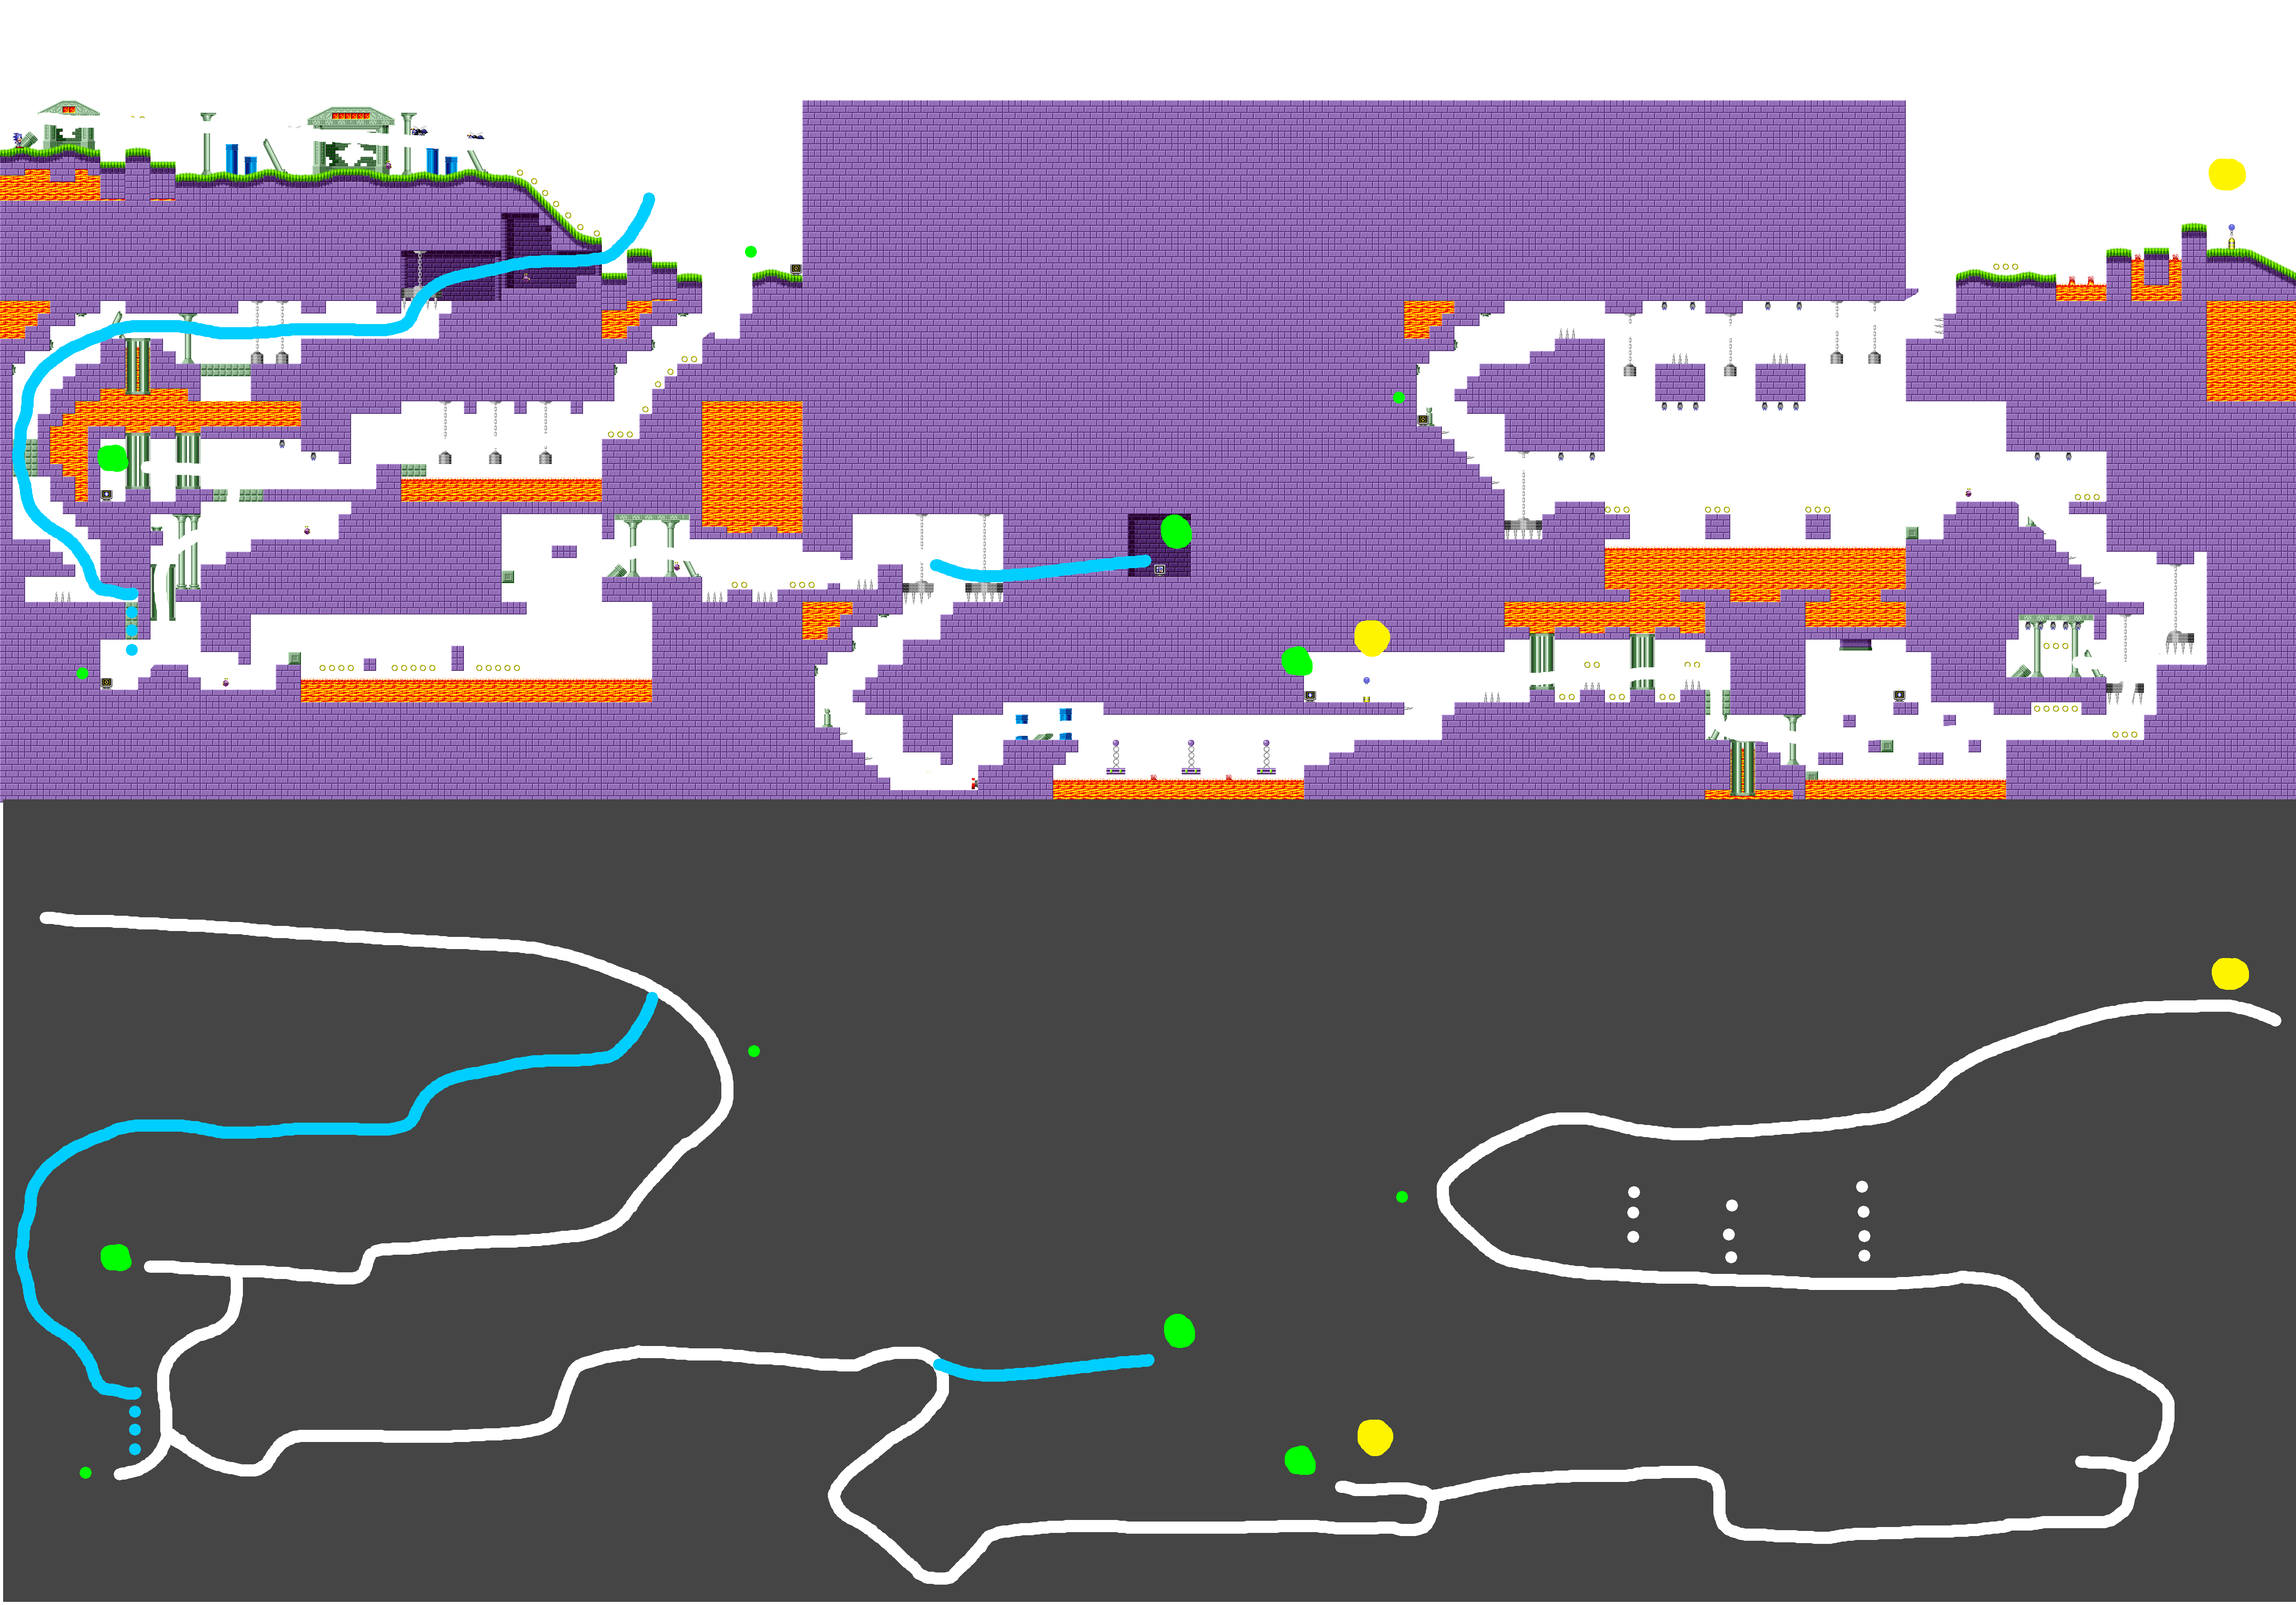
Scrap Brain Zone: ACT 2
Perhaps you’re confused- this level is another vertically wrapping levels, like Labyrinth Zone Act 3. It looks mind bogglingly complex, dare I say interesting, when observed without notes or edits. I have done the hard work of simplifying the level for you, without having to think of sonic warping from the top of the screen to the bottom. I have (mostly) eliminated duplicate geometry for clarity. This was super easy because the level is extremely simple. You have 2 paths: a main one and a red one. The main path has a secret, hidden path you can take (more on that later) that simply skips the hardest part of the main path. At no point do the paths meaningfully interesect.
I’ll be honest: I’m not sure why this level needed to be this complex. You don’t feel that complexity when navigating it. Because paths never meaningfully connect to each other (until the end), you will probably never be clued into how the space does (and doesn’t) connect to itself. No matter how you shake it, you are simply avoiding things in a hallway. Is it maybe thematic of the threat Robotnik’s developed plans for the world? Perhaps!
Is it good?
About that green path: the teleporter will drop you off at a different station if you have more than 50 rings. I’m dead serious, I had to look it up. Nothing else in the game works like that.
Before you ask, the vertical scrolling results in exactly ONE impossible space- the winding staircase section copied from Act 1. for simplicities sake:

Scrap Brain Zone: ACT 3
Leave this stage alone- it’s a good stage! I’m serious! The checkpoint placement isn’t too bad, and it’s a short enough length to justify its more funnily existence. I feel like this level SHOULD have replaced one of Labyrinth zones acts, and it would have been fine. It even has a nonstandard entrance and exit!
Again: I don’t think a level has to have branching paths to be good, and all things considered the main path is still fairly linear- but the mechanics it asks you to engage with are reasonable and don’t waste your time. No slow weird switch puzzles- just meaningful use of the water physics! Sure, later sonic games do it way better, but this stage is distinct in a way that is interesting. It has the most aggressive shortcut of every level in the game!

I don’t have a witty or insightful conclusion. I hope I have given you, my dear reader, interesting tools to analyze Sonic’s level design. I may return to this analysis should I choose to analyze the future games. While I don’t particularly believe in the objective critique, when I do any sort of serious analysis I try to completely abstain where I can. I never succeed, but I do hope I haven’t misconstrued any of the insights regarding Sonic 1’s pathing- I like to think the devs were trying to build the bridge while driving over it. There is a reason the sequels Immediately become increasingly complex affairs in regards to pathing!
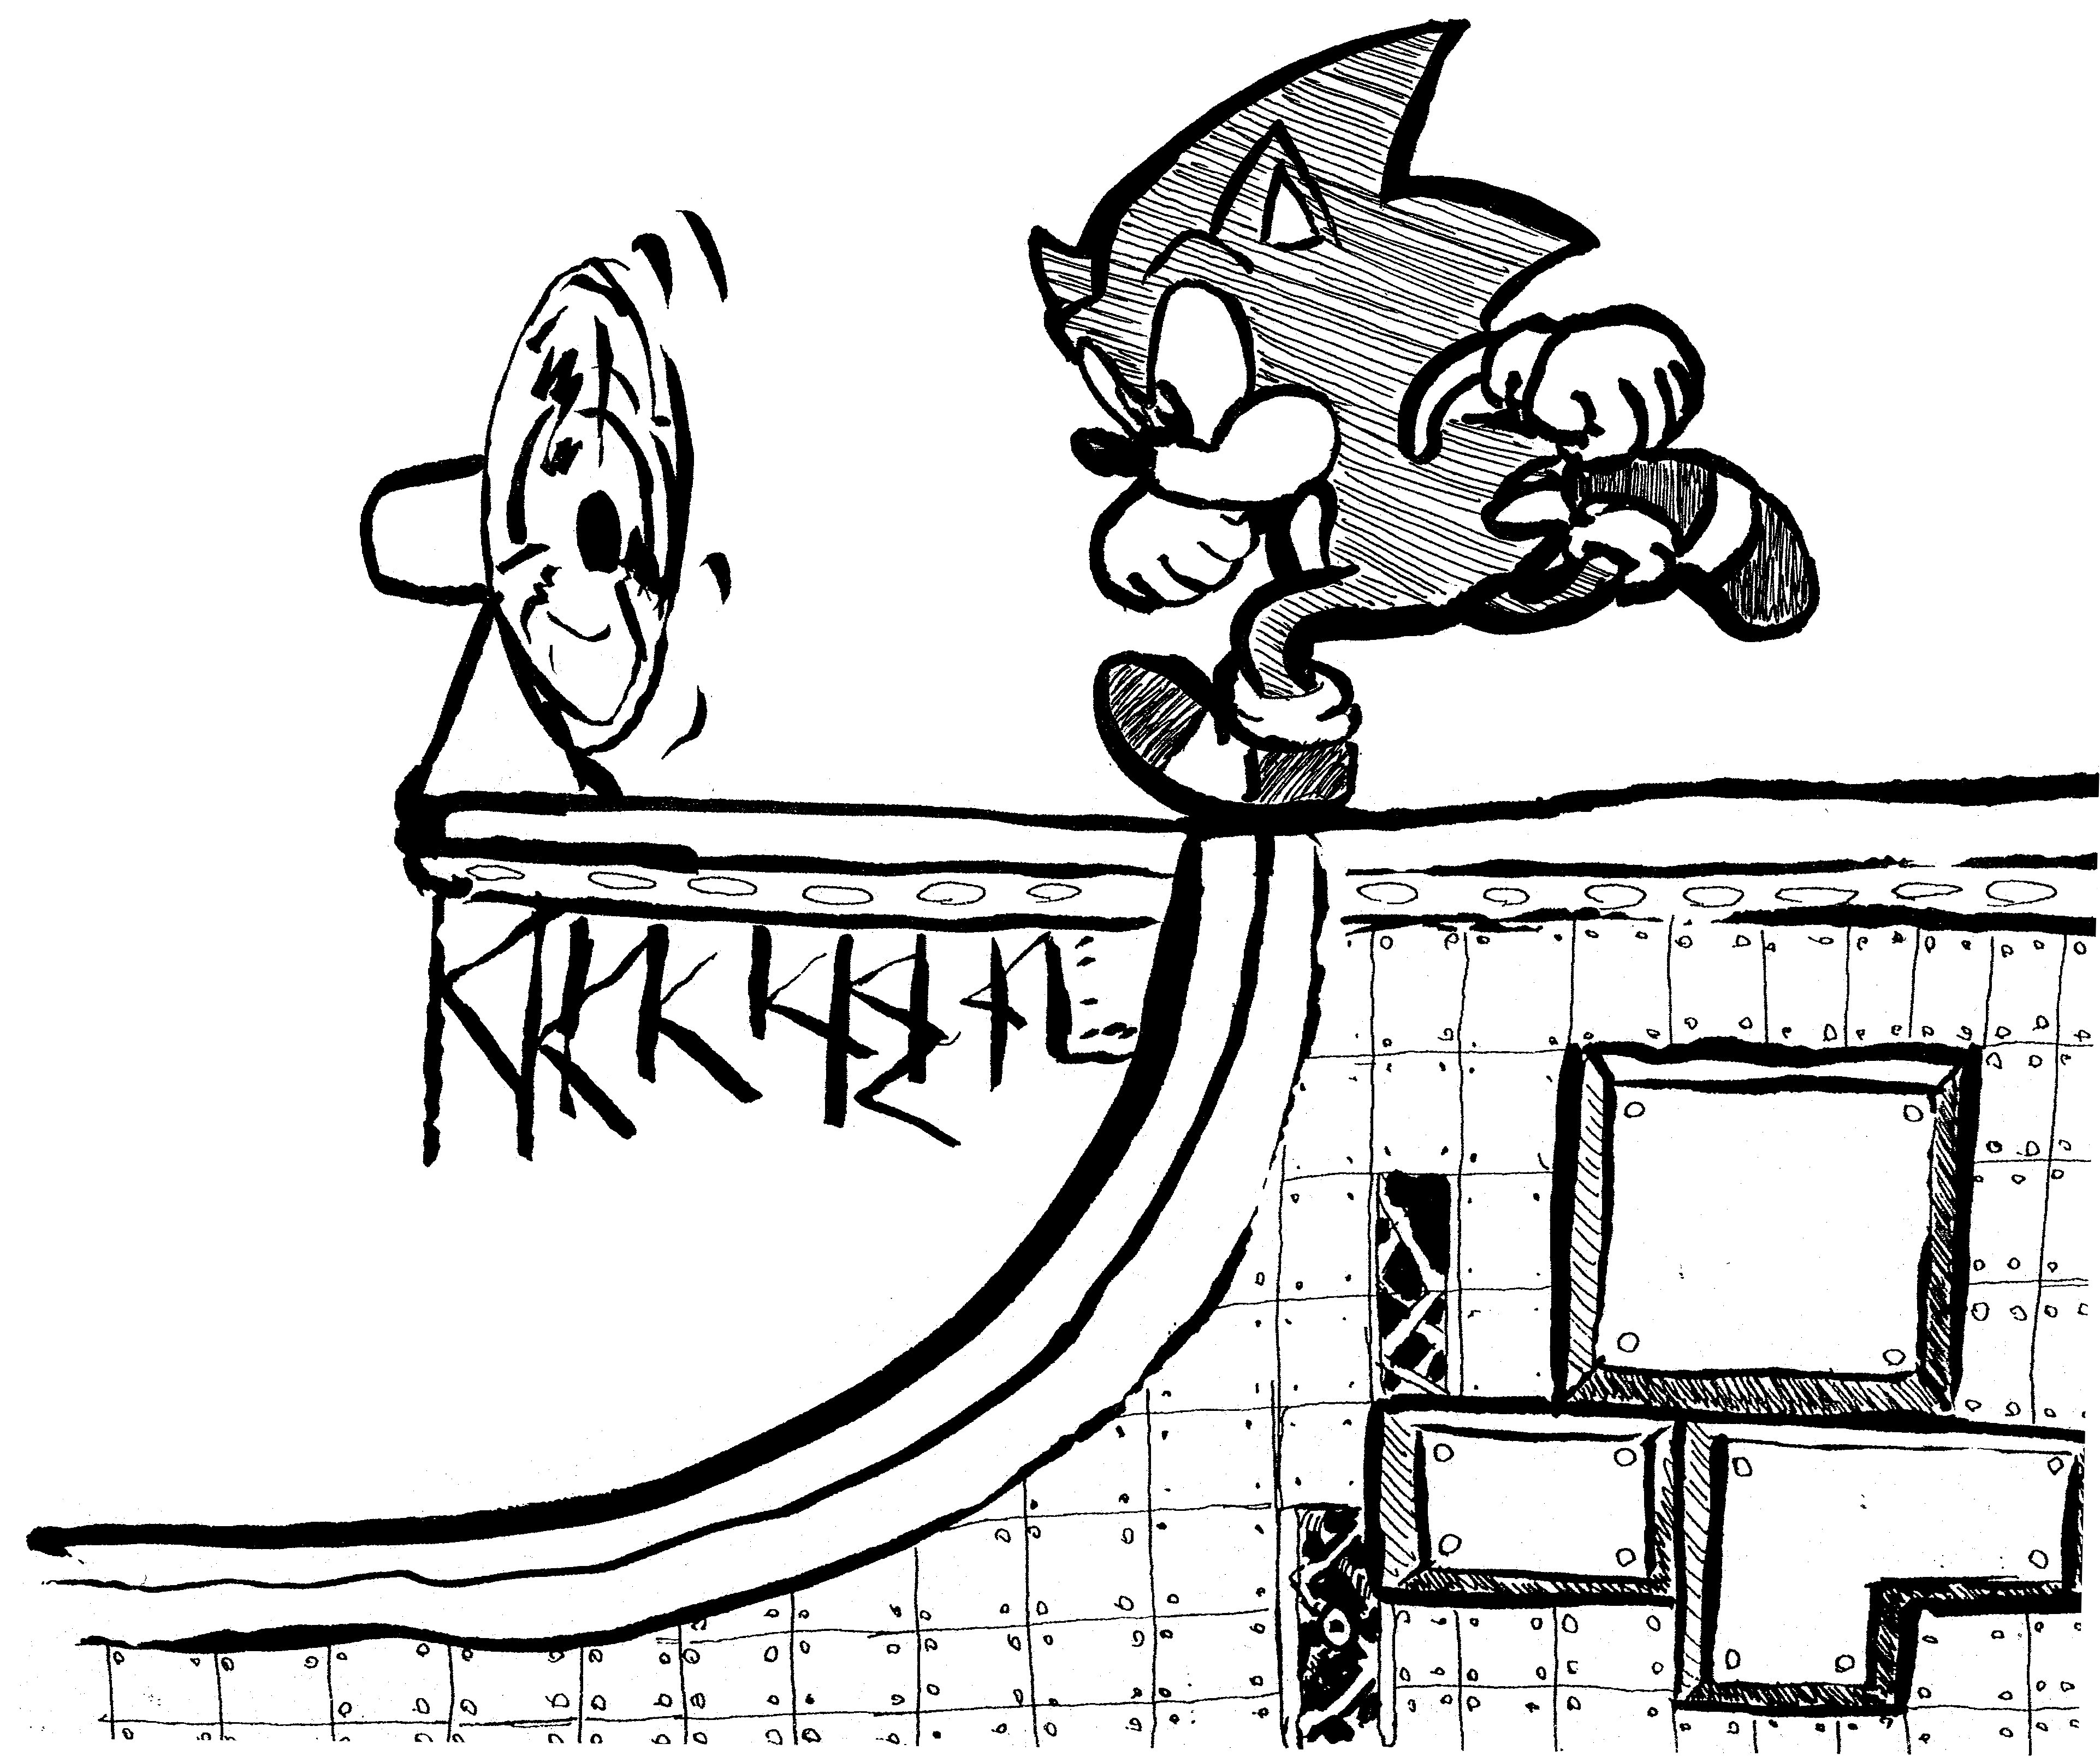
Thank you for reading- please walk away with your own conclusions, share interesting ones with me in the comments or online! Right now my brain is fried. I was talking about arcade machines while writing this and instinctively drew this:
Please send help.